Zone picking step by step: split by zone, pick by cart, merge by order
A step-by-step tutorial: prepare zones, a consolidation area, carts and pickers, then run the full flow — precheck, generate a batch, bind a cart, pick by zone, check in the whole cart, merge ready orders and track it all on the board.
Overview#
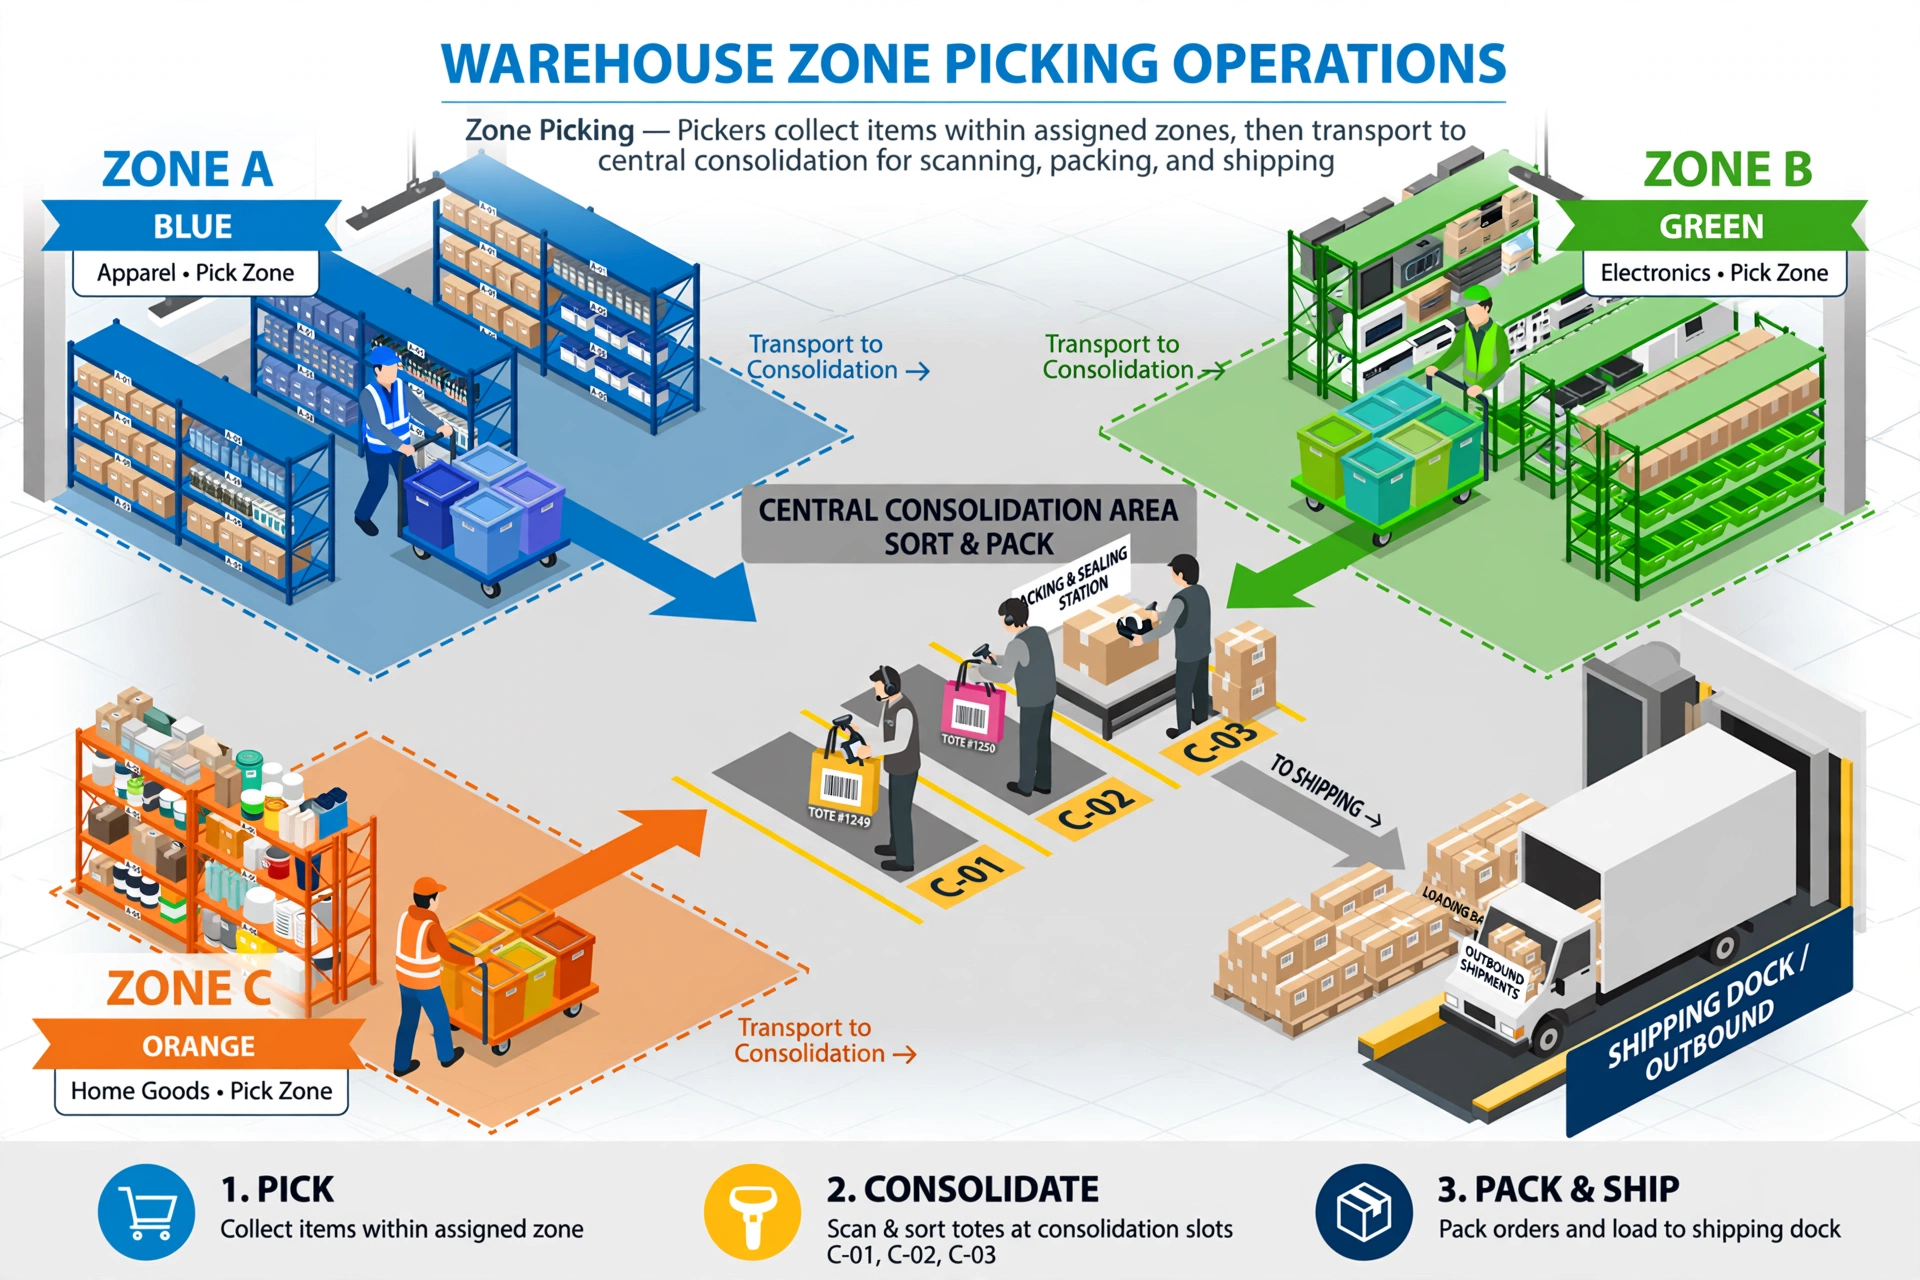
When a warehouse grows, one order's goods end up scattered across several physical areas. Zone picking splits each order by zone: every zone gets its own pick task and its own picker, who picks only inside that zone and loads each order into its own tote on a picking cart. When a zone is done, the whole cart is pushed to the consolidation area and checked in with two scans — slot code plus cart code — no tote-by-tote scanning. The system counts, order by order, how many totes should arrive and how many have arrived; as soon as an order is complete it can be merged into outbound cartons, and the consolidation board shows the whole picture live. Remember three phrases: split by zone, merge by order, quantities must match.
Before you start: prerequisites#
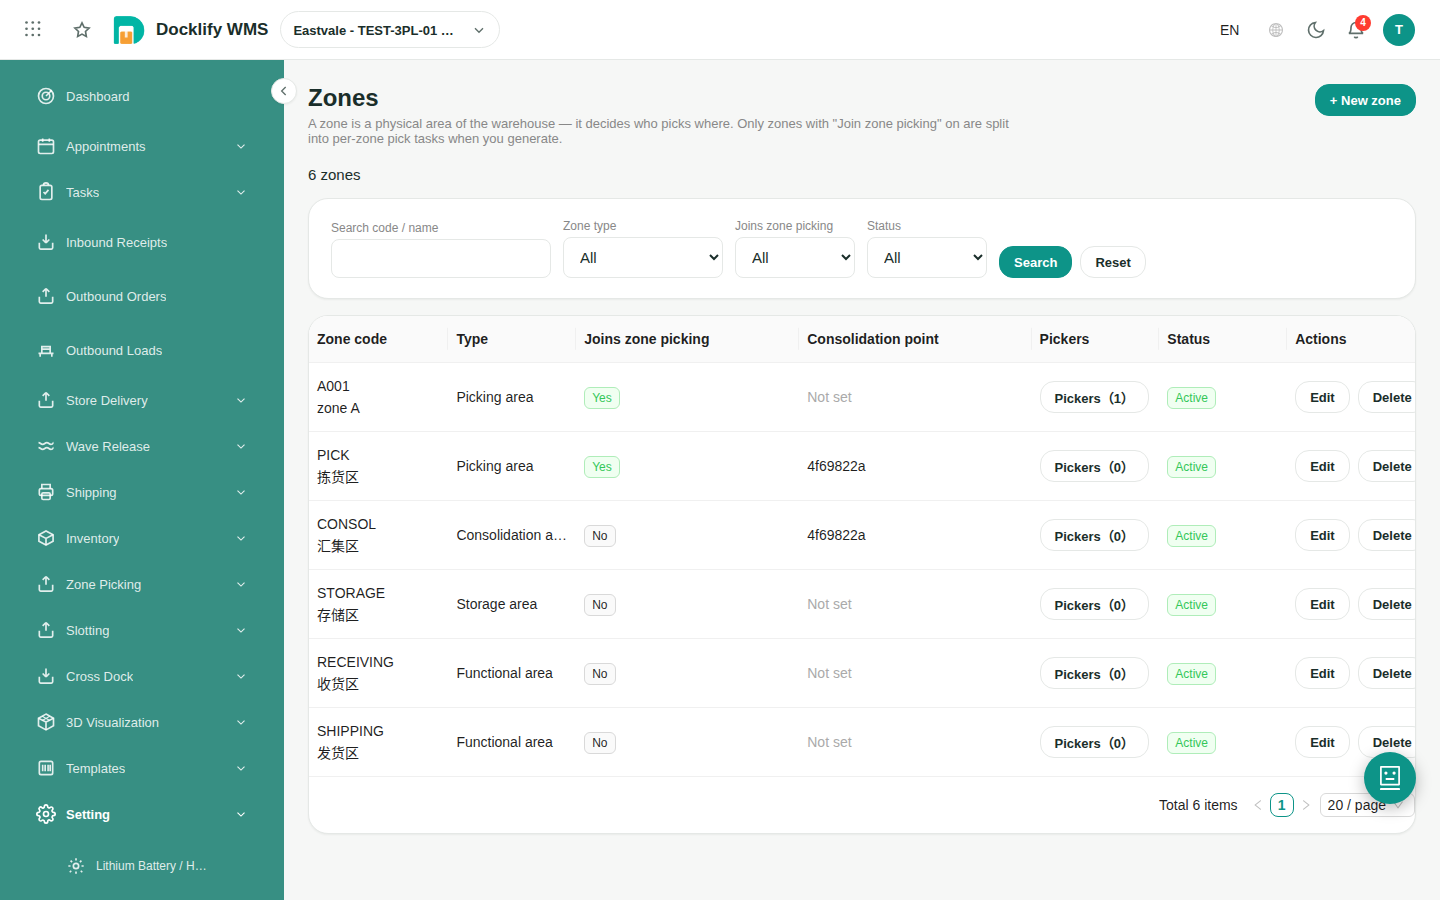
- Zones are set up and zone picking is enabled: every location belongs to exactly one zone, and the picking zones that take part in zone picking have the zone picking switch on. Only picking zones join — storage and functional zones never do.
- Each picking zone has a consolidation point configured: in Zone management, set the consolidation location for every picking zone — that is where its carts are pushed when picking is done. One shared consolidation area for the whole warehouse is the normal setup.
- The consolidation area is ready: a consolidation zone with numbered floor slots — C-01, C-02, C-03 and so on — each with its own barcode label at the head of the slot. Eight to twelve slots handle a typical batch.
- Picking carts and totes are ready: every cart has a scannable cart code, and totes carry permanent, reusable barcodes. The rule is one tote per order — a tote never mixes two orders.
- Each zone has a fixed picker: bind a primary picker (and a backup if you like) to every zone in Zone management. New zone tasks are auto-assigned to the bound picker, so nobody has to hand out work order by order.
Step by step#
Step 1 — Select outbound orders and open the Zone Pick precheck
On the desktop, open the Outbound Orders list, filter if needed, and tick one or more orders. Then choose "Zone Pick" from the "Create pick task" menu. The system allocates the orders' stock first, then opens the precheck — nothing is generated yet, so you can still back out safely.
Step 2 — Read the precheck: the zone split and shortage warnings
The precheck shows, for every order, how its lines split across zones — which zones hold stock for it and how much. Read it before you confirm anything:
- Zone split: an order with goods in two zones will be picked by both zones and merged later — that is normal, not an error. The precheck also tells you the expected totes per order per zone.
- Shortage warnings: lines that cannot be fully covered are highlighted. Replenish first, or remove the short line from this run and handle it separately — do not generate a batch you already know cannot complete.
- Out-of-zone lines: whole-pallet lines that live outside the picking zones stay on a normal pick task and join the same orders later at consolidation, by order number.
- Zone not set up (red ⚠ tag): if goods sit in a zone that is not registered yet, or whose Zone Picking switch is off, the precheck marks that zone in red. Those goods will not be picked by zone — they go on a regular pick task instead, and the generate step shows the same warning again with the order number and quantity. The goods can still be picked and merged normally; only the by-zone split does not apply to them. To pick them by zone next time, register the zone first under WMS → Master Data → Zones and turn on its Zone Picking switch.
Step 3 — Confirm and generate the batch and its zone tasks
When the precheck looks right, confirm generation. The system creates one consolidation batch with a CB- number (for example CB-20261020-QRM6) covering all the selected orders, and one pick task per zone that actually has stock — a zone with nothing to pick gets no empty task. Each task is auto-assigned to its zone's bound picker, and the system records, per order, how many totes each zone is expected to deliver. That expected count is what consolidation will check against later.
Step 4 — The picker scans a cart code and binds the cart
On mobile, the picker opens their zone task and taps Start task, then scans the picking cart's code. That one scan binds the cart to this task: the cart status flips from Empty to In use, and the system lays out the cart's totes — one tote per order in this task — so the picker always knows which tote belongs to which order before the first pick. A cart only ever serves one batch at a time; a cart already bound to another batch cannot be bound again.
Step 5 — Pick inside your zone, into each order's tote
Picking itself reuses the screens you already know — only the scope is smaller: you stay inside your own zone and follow the task's route line by line. For each line: scan the location (and the pallet, where the task asks for it), take the quantity shown, drop the items into the tote that belongs to that line's order, and confirm the picked quantity. If a location turns out to be short, report the shortage on the task instead of quietly picking less — consolidation compares picked quantities against the order, and a silent short pick will block the merge later.
Step 6 — Push the whole cart to consolidation and check it in
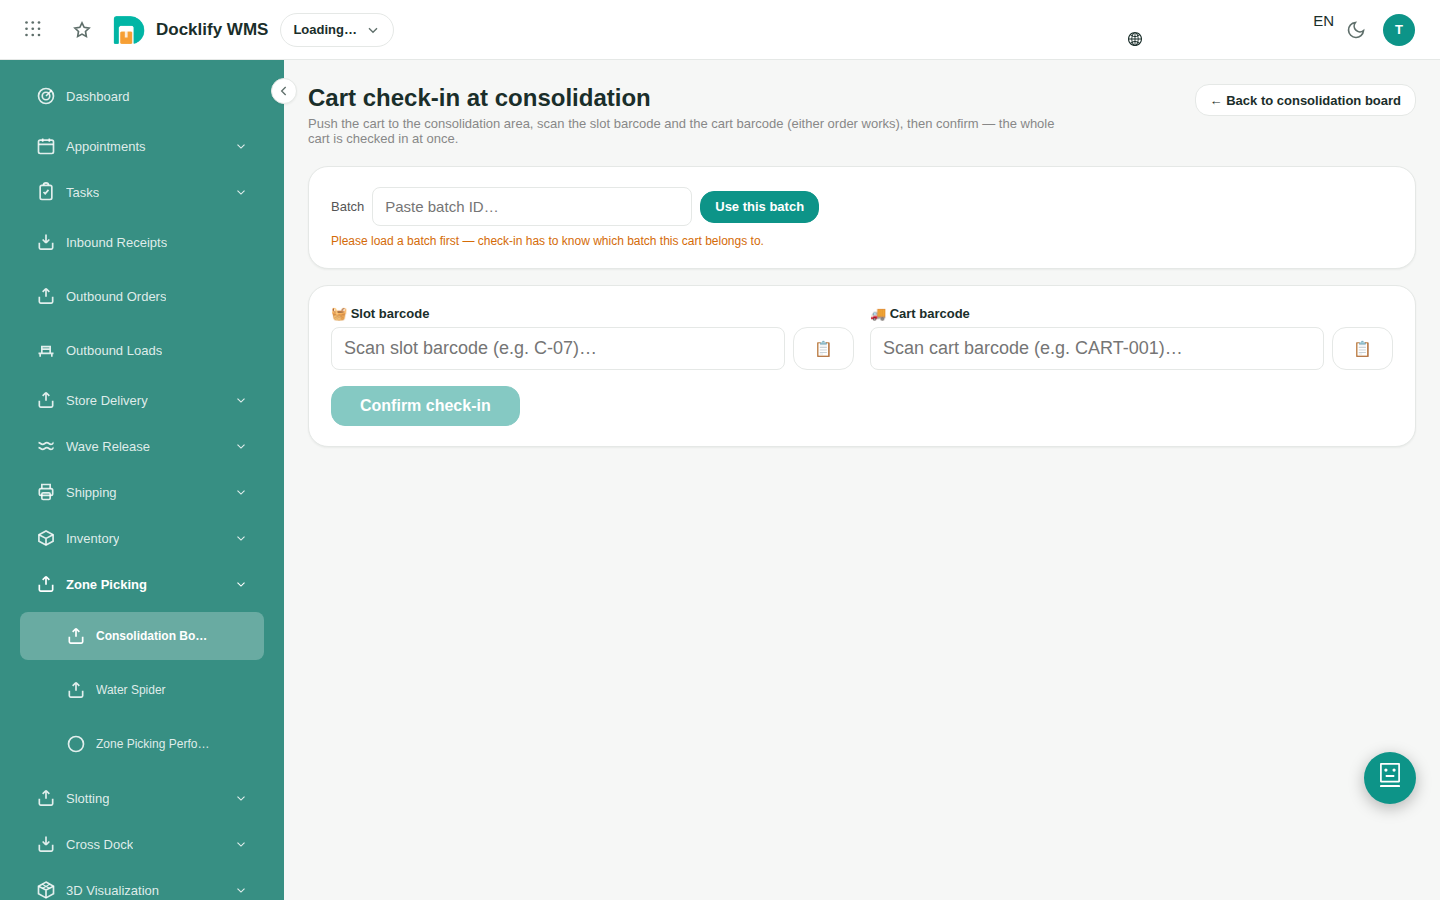
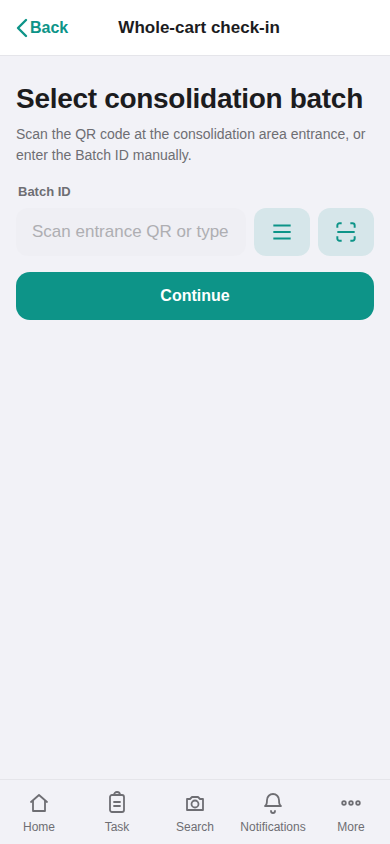
When the zone task is completed, the cart status flips to Full. Push the whole cart to the consolidation area your zone is configured with, park it at a free slot, and check it in: on the desktop Consolidation → Check-in page, or on mobile under Consolidation, scan the slot code (C-01, C-02, C-03…) and then the cart code. Two scans check in the entire cart — every tote on it is counted as received for its order in one go, the cart status becomes At consolidation, and each order's received count moves up. If the cart carries totes from another batch, the check-in refuses the whole cart: mixed batches are the number one source of mixed orders, so the cart goes back to be split first.
Step 7 — Merge an order as soon as all its totes have arrived
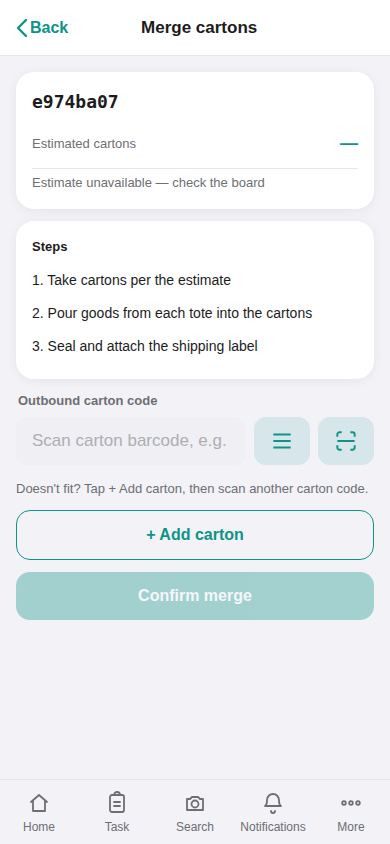
You never merge the whole batch at once — you merge order by order, as each one completes. The board and the mobile consolidation screens show, per order, received versus expected totes and which zones are still missing. When an order's received count reaches its expected count across all zones, its status turns Ready. Open the merge screen (desktop or mobile), take the outbound cartons the system suggests, pour each tote into the cartons, confirm the actual carton count, then seal and label. Before the merge goes through, the system checks that the tote quantities add up to the order — if they do not, the merge is blocked (see FAQ). After a successful merge, the order's slot is released for the next order, the empty totes flow back for reuse, and once every order the cart carried is merged, the cart returns to Empty, ready for the next batch.
Step 8 — Track everything on the consolidation board
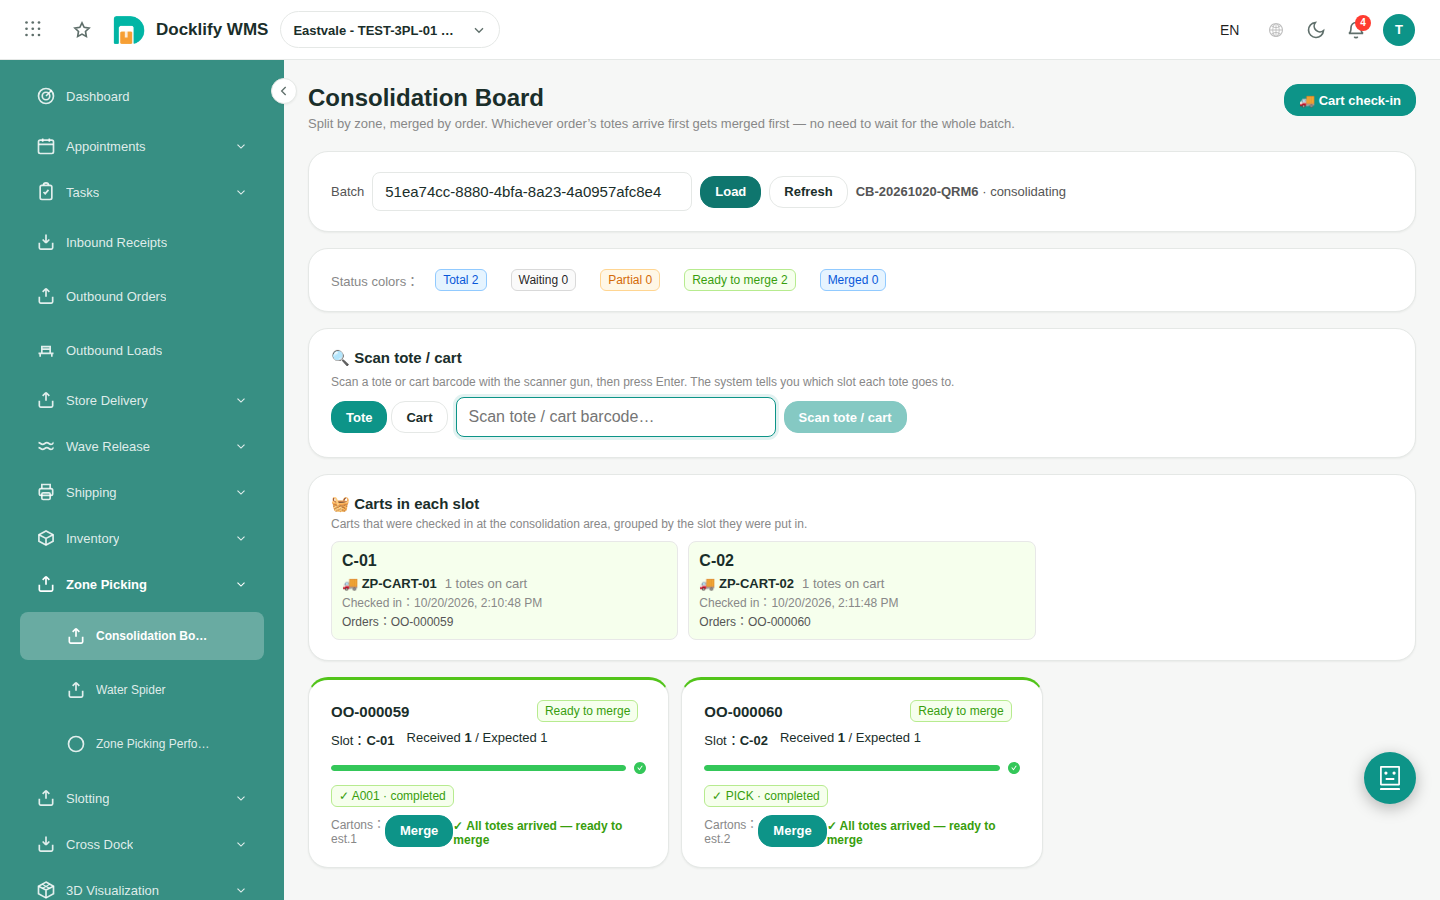
Open the consolidation board for the batch and you see the whole operation at a glance: every slot and which carts are parked in it, every order with its per-zone progress — which zones have checked in, which are still picking — and a summary counting how many orders are waiting, partial, ready and merged. Supervisors run the floor from this screen: a zone falling behind shows up here first, long before it becomes a late shipment. When every order in the batch is merged, the batch closes and the slots and carts are all free for the next run.
One thing to keep straight: there are two slot numbers. The physical slot is the floor slot a cart is actually parked in — the one the worker scanned when checking the cart in — and the board groups carts by physical slot. The order slot (labelled "Order slot" on each order card) is a slot the system assigns to an order so its totes have a home while waiting to merge; it is released when the order merges. An order card shows both: its order slot, and the physical slot(s) where its goods are actually parked. When you go looking for goods on the floor, use the physical slot; when the system talks about releasing a slot after a merge, it means the order slot.
You do not need a link from the wizard to find the board. Just open the Consolidation board from the menu: the landing page is a warehouse-wide overview of every active batch in the warehouse you have selected at the top — totals for all orders, how many are merged, how many are complete and waiting to merge, and how many are still being picked — plus a card per order (with its batch number, its order slot and its received/expected tote progress) and the consolidation slots currently in use. Click any order card or any row in the batch list below (which also lists closed batches) to open that batch. Batch numbers are the short readable codes like CB-20261020-SEFH: type one into the Batch box at the top to jump straight to it — you never need the long internal ID.
Step 9 — Give the consolidation area a slot pool and watch the whole wall#
By default the board can only list the slots that are currently in use: slots are just barcode labels, so the system cannot know how many your consolidation area really has, or which ones are free. The slot pool fixes that. The pool is the master list of the physical slots that actually exist in this warehouse's consolidation area. Build it once under WMS → Master Data → Consolidation Slots: pick the consolidation area, then use bulk generate — prefix C- plus a number range such as 1 to 60 creates C-01 to C-60 in one go, skipping any that already exist. You can also add slots one by one, renumber them, change their display order and remarks, and deactivate a slot instead of deleting it when it is temporarily out of service. Print all slot labels from the same page and stick each label on its physical slot. The page always follows the warehouse selected at the top — switch warehouse, and you are maintaining that warehouse's pool.
Once a pool exists for the warehouse, two things change. First, check-in gets stricter in a good way: a cart check-in or a slot confirmation only accepts a slot that is in the pool and active. Scan a slot that is not in the pool and the system stops and tells you to add it under Consolidation Slots first — no more carts quietly parked in slots nobody tracks. Warehouses without a pool keep working exactly as before. Second, the board landing page becomes a slot wall: every slot in the pool is shown, free ones included.
- The number strip at the top shows slot occupancy (slots in use out of active slots), active batches, total orders, merged and ready-to-merge counts, and overall tote progress (received out of expected).
- Colors: grey is free, blue is in use with a mini progress bar, green is full and ready to merge, red means an issue (a zone component is still missing), and deactivated slots are dimmed. Each block shows the slot number in large type, the first order parked there, the customer, and its received/expected progress; click a block to open that order's batch board.
- Filters narrow the wall to one batch, or to issues only. The order cards from before are still there — switch between Slot wall and Order cards at the top of the section. Big screen mode puts the wall full-screen with a 30-second auto-refresh, made for the warehouse TV; on a phone the grid simply adapts to the narrower screen.
FAQ#
- What does "Partial" mean on the board? Some of the order's totes have arrived at consolidation, others are still on their way — usually one zone is still picking, or its cart has not been checked in yet. The order cannot merge yet. The board shows exactly which zones are missing, so you chase the right zone instead of the whole warehouse.
- The merge is blocked by a quantity mismatch — what do I do? Do not force it. First recount the totes sitting in the order's slot. Then open the zone task the suspect tote came from and compare picked versus expected per tote — a short pick usually explains the gap. Hand it to a supervisor: they either send a top-up pick for the missing quantity, or approve merging the order short, in which case the system marks the order as short. The block is the system protecting you from shipping the wrong quantity.
- What are the four cart statuses? Empty — idle, free to bind to a new task. In use — bound to a pick task, picking in progress. Full — the zone task is complete and the cart is waiting to be pushed to consolidation. At consolidation — checked in at a slot, its totes counted as received, waiting for its orders to merge. After the merge of its last order, the cart returns to Empty on its own.
- Do I have to scan every tote when a cart arrives? No. The whole-cart check-in replaces tote-by-tote scanning: scan the slot code and the cart code, and every tote on the cart is received against its order at once.
- An order is complete in one zone but another zone is slow — does consolidation wait for the whole batch? No. Orders merge one by one as each completes; the slow zone only holds its own orders, and the board keeps them visible with the missing zone highlighted until they land.
- The task list shows a regular pick task I did not create — where did it come from? When an order is split by zone, the lines that cannot go by zone (whole-pallet lines, or goods in a zone that is not set up for zone picking) are put on a regular pick task in the same batch, so nothing is left behind. In the task list it carries an orange "Zone split · regular lines" badge with the batch number and its source zones — a ⚠ on the badge means one of those zones is not registered or does not have Zone Picking on. Pick it like any normal task; its goods join the same order at consolidation.