Packing Station: pick, pack, weigh, ship
Finish small parcel orders here: call up the order three ways, pack it into cartons, verify the weight and finish packing. Only small parcel orders in 'picked' status can be processed; when packing is done the order becomes packed, and it becomes fulfilled once the carrier handover is confirmed.
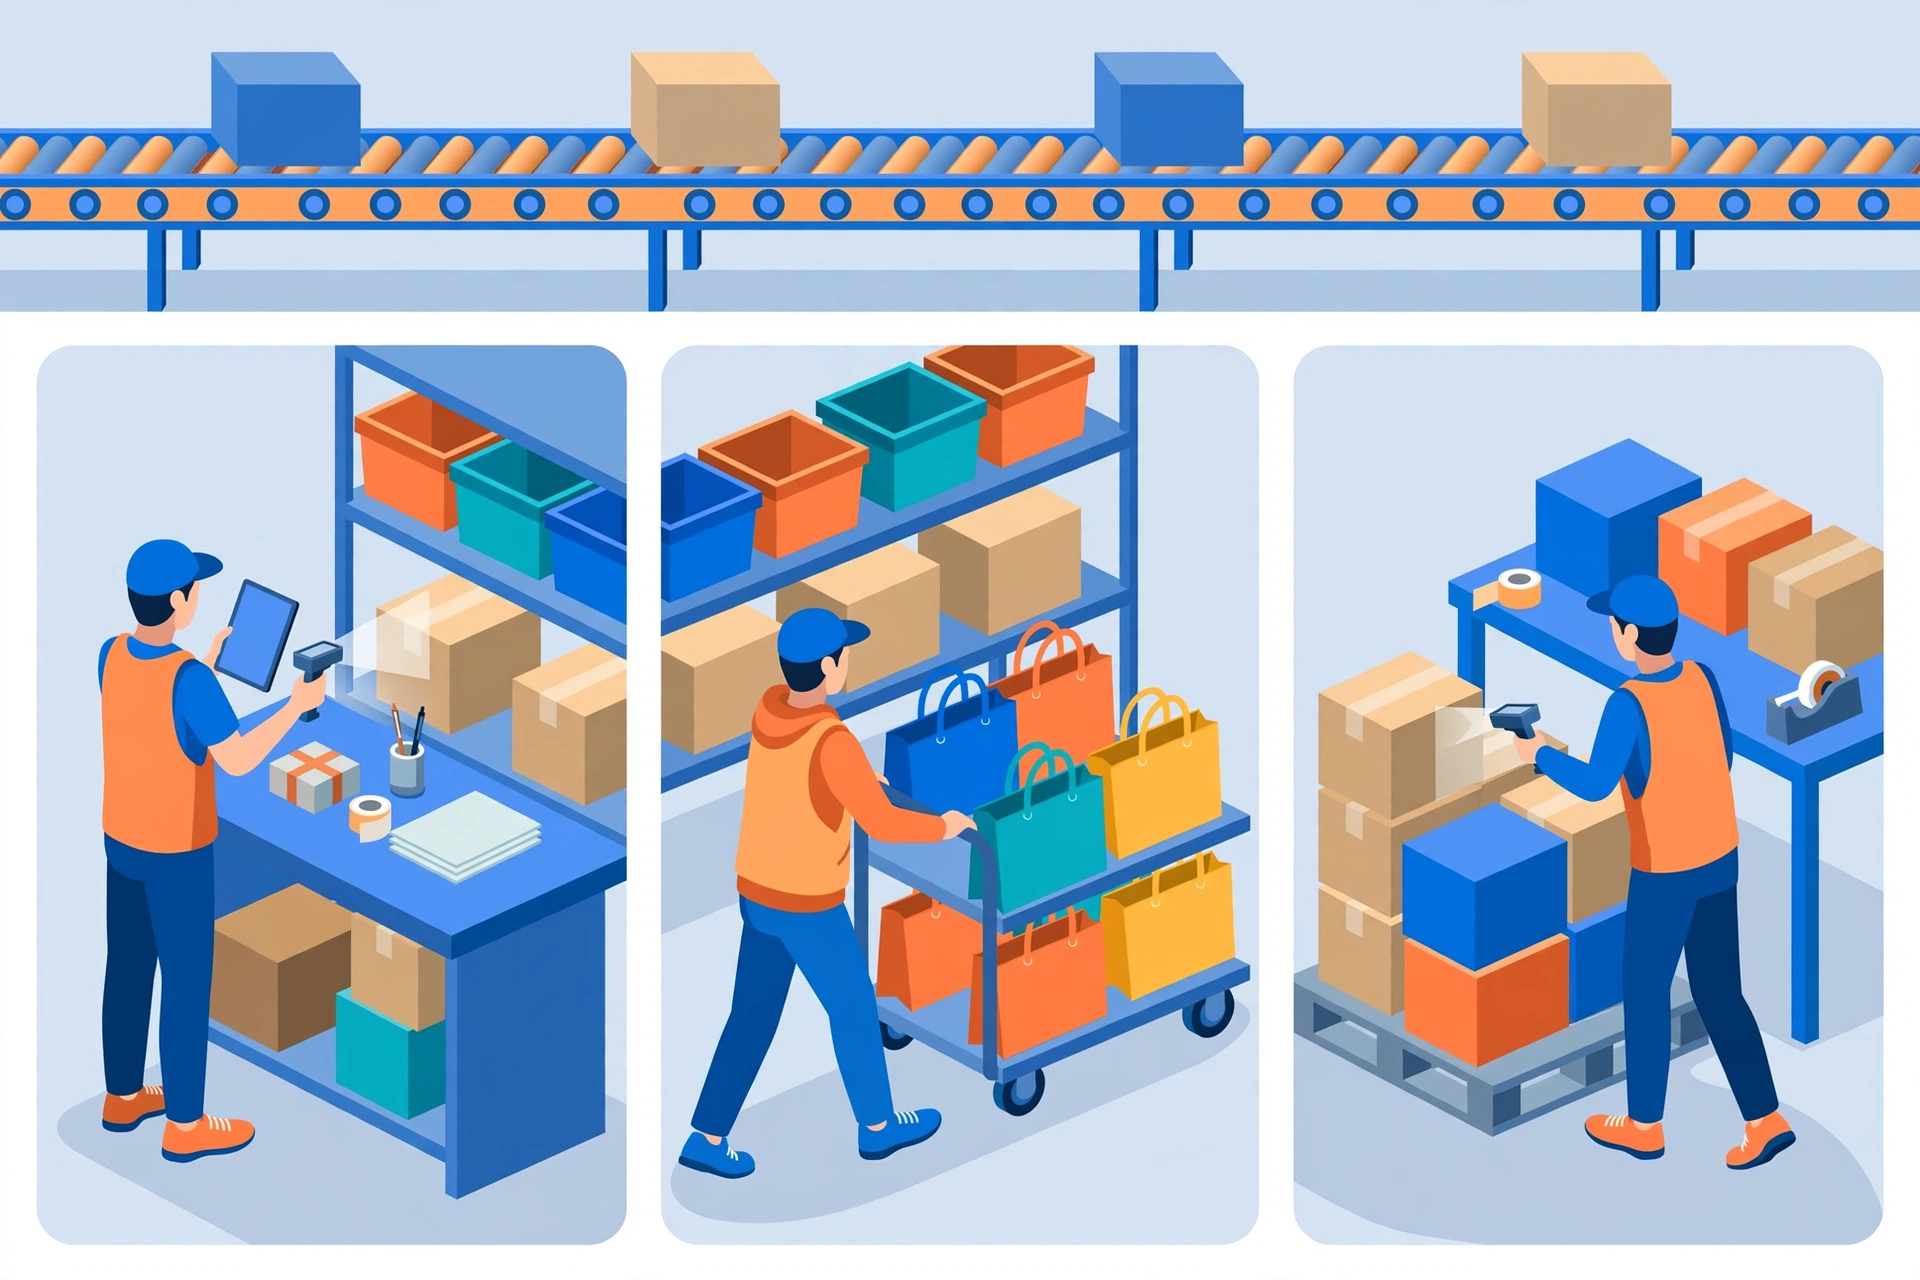
Three ways to call up an order#
The Packing Station handles three picking scenarios. How you call up the order differs per scenario; everything after that is the same flow.
- Order Pick: scan the order number, the LPN, or the task number — the order opens directly.
- Cluster Pick: scan the cart number or the Task number — the screen shows the tote numbers and each tote’s order list. You can also scan a Tote number directly, or type an order number by hand.
- Wave Pick: scan the LPN — the screen prompts you to scan the item, and the system finds the matching order through the SKU rule, then opens that order.
Packing flow#
The screen shows the order info first: ship-to address, items and quantities. The order starts with one package by default.
- Scan products to add them to the current package — each scan is checked against the order so you cannot add a wrong item.
- Add more packages when one is full, and switch between packages with a tap — each package is packed independently.
- For each package, pick a carton from the dropdown: free cartons supplied by the client, or paid cartons from the tenant. Choosing a carton automatically fills in its volume and weight.
- Products show their photo when one exists — products without a photo take up no extra space on screen.
Products with serial numbers: scan every serial#
Some products are tracked by serial number (the order line shows a “serial” tag). Those units are packed one serial at a time — scanning the product barcode alone does not add them.
- Scan the serial number directly — the matching product is added to the package and the serial shows under the product. Or scan the product SKU first: the quantity box is replaced by a serial-number box, and each serial you scan adds one unit. While you collect serials, the scanned SKU stays visible inside the product scan box, so you always see which product you are scanning serials for. Serials can be scanned into the main scan box too. The on-screen prompt keeps showing your progress (for example “Serial numbers: 1/2”) and stays until the last serial for that product is scanned — tap “Not now” only if you want to dismiss it early.
- Only the serials picked for this order can be packed. A serial from another order, one that has not been picked yet, or one that already shipped is stopped on the spot with the reason shown — it cannot get into the package.
- Scanned the wrong serial? Each scanned serial shows under the product as a highlighted badge (easy to spot) with a remove (×) button — remove it and scan the right one. The package keeps count by serials, so the progress you see is the serials you have scanned.
- The label can only be printed once every serial for the package is scanned — if some are missing, the station tells you which product and how many are still missing.
3D Pack: let the system split the packages#
When every product on the order is marked "needs repack" and every product has dimensions on file, a 3D Pack button appears next to the order number. 3D Pack tries the client’s packing materials and works out how many packages to make, which carton to use for each, and how the items sit inside.
- Tap 3D Pack — the plan opens with the package count, the chosen carton, the average fill rate, the estimated material cost and the total theoretical weight.
- Every package gets a 3D thumbnail card in the row at the top — also when the plan has just one package: scroll sideways if they do not all fit, drag any thumbnail to rotate it, and tap one to open it large below. Prev / Next still work for stepping in order. The large 3D view labels the carton length, width and height on its edges; drag it to rotate, and tap an item block — or its row in the list — to highlight it. Each item row also shows that product’s size.
- Prefer a different carton? Choose "Use only this box" and recalculate — the plan is rebuilt with just that carton.
- Tap "Create N packages from this plan" — the packages appear below, already filled. You can still adjust them by hand and finish packing as usual.
Weight rules#
Every package gets a weight before the shipping label prints. The theoretical weight is the sum of the product weights plus the carton weight — packing filler is not counted.
- Priority: scale reading wins over hand-entered weight, hand-entered wins over theoretical weight.
- If the measured weight differs from the theoretical weight by more than the warehouse tolerance (pack_weight_tolerance_pct, default 10%, set in warehouse master data), the system raises an alert.
- The weight source — direct scale, Hub scale, hand-entered, or theoretical — is written to the audit log on every shipment.
- The package panel shows the result under “Calculated Weight” — just the number, with no source note next to it. Which source won still follows the priority above and is still kept in the audit log.
Digital scale (optional)#

Have a USB scale? Plug it into the computer and connect over Web Serial (9600 baud, ASCII). Tap the ‘Connect scale’ button, watch the live reading on screen, and tap ‘Use scale weight’ to take the reading into the package. No scale connected? Nothing changes — hand-enter the weight or fall back to the theoretical weight. The manual weight field and the scale controls sit on the same row as the package L/W/H fields.
Serial scale, or a browser without Web Serial? Use the Hub scale instead: connect the scale to Device Hub on the bench computer first (Device Hub supports both USB and serial scales — pick the protocol preset that matches yours, test-read it, and set it as the default scale), then click ‘Use Hub scale’ here. Readings stream in the same way, and ‘Use scale weight’ takes the number into the package; the shipment record shows the weight came from the Hub scale. If the button is greyed out, hover over it to see why — Device Hub not running, too old, or no default scale set.
Labels: print, reprint, void — and finishing the order#
Print the label package by package, or use "Print All Labels" at the top to print every unfinished package one after another — any failure is reported at the end and does not stop the rest. Each printed package shows its tracking number — check it against the physical label, or type the number in by hand if the label was printed elsewhere. Use "Preview" to see the label on screen first, and download it as a PNG if you need a copy. Printed the label but the paper jammed? Use Reprint: the same label goes out again with the same tracking number, never a new one. Label printed for the wrong order? Void it first — a voided label stays in the record for audit but drops out of the end-of-day manifest — then print a fresh one. There is no Confirm button anymore: as soon as every package on the order is finished, the order is packed automatically and the screen clears for the next order. Packed is not shipped yet — the order becomes fulfilled when the carrier handover is confirmed. And if you void the last good label on an already-packed order, the order goes back to packing and you simply print a new label to finish it again. Opening a packed order shows its packages read-only — products, quantities, box and tracking numbers, with the packing progress complete — and packing itself is locked; voiding a package is the way back in. If a label was printed with a carrier account, the void goes to the carrier first: the order here only changes after the carrier confirms, and if the carrier declines, nothing changes and you can simply try again. If no live carrier connection is configured yet, the void runs as a simulation instead, and the result message says so.
The print gate: generated is not printed
Generating a label sends it to the printer right away, and each package now carries its own print state: Printed or Not printed. A label that was generated but never came out of the printer does not count as done — packing cannot finish until every package is Printed (a local Hub print, or queued to the cloud, both count). If packing is blocked, the message says so plainly: check the printer and use Reprint on that package. The gate does not apply to a tracking number you typed in by hand, because that label was already printed elsewhere.
Two more helpers on the same screen. "Print Packing List" (at the right end of the packing progress row) prints the packing list for the order — if the retailer has its own template it is used, otherwise the default template. Carrier and service belong to the order, not the package: they are shown read-only at the order level, and only someone with permission sees a Change button there (Assign carrier when the order has none yet). Changing them opens a small form — pick the new carrier and service plus a reason (the reason list is kept in Master Data; every change is recorded with who changed it, when, the old and new values and the reason) — and the change applies to the whole order at once. If rate shopping is on for this customer and the order names no carrier, each package instead shows a Compare rates button: quotes come back for that package’s own weight and size, tap Use on the one you want (you can only pick from the list), or just print and the cheapest quote is used automatically. Your pick is recorded, and once the label prints, the package shows the carrier and service it actually shipped with; to change it after that, void the label and print again. And a single-item order that needs no repacking — with weight and dimensions complete — gets a direct-print button on the order header: one click prints the label, no scanning needed.
Your packing station: pick a station first, then work#
Work at the Packing Station belongs to a packing station. Pick yours at the top-right of the page before you start — the page remembers your choice on this computer, so next time it is already selected. If no station is picked, the bench stays locked and a hint tells you to pick one first. Stations themselves are kept with the ⚙ gear button (Manage stations) at the right end of the toolbar (code, name, warehouse, active or not) — no separate settings trip. Changing stations in the middle of an order asks for confirmation, and everything you do is recorded under the station that was selected at that moment. If an order belongs to a different warehouse than your station, the page says so and asks you to switch to a station in that warehouse; you can still view the order.
An order that has not finished picking can still be loaded and checked. Scan items and the page confirms each one against the order — but packing, label printing, shipping and 3D Pack stay off until picking is done, and the banner at the top explains why. The same applies to an order that already shipped: you can review it and verify scans, nothing more. Once the order is picked, everything unlocks.
Two things on the order header changed. 3D Pack is always there now: when it cannot plan packages for this order, tapping it explains why in plain words — a product is missing its dimensions, or this client has no packing material yet — and what to do next. And "Print Packing List" shows a preview first: check the packages and items on screen, then confirm to print. Only the confirmed print counts as the packing list’s printed time, so opening the preview never marks anything as printed.
The "History" button at the top opens a drawer with two tabs. The Packing Log tab shows your station’s activity for the day: orders completed, packages, labels printed and errors, with every action listed by time — loading an order, scans, label prints, voids, shipping. Errors show in red with the reason, and you can filter to errors only or look at another day. If one package fails while batch-printing in wave mode, the rest still print; the summary at the end tells you how many failed, and you reprint those from their own rows. And if a label gets damaged after the order shipped, open the order’s Shipped tab and use "Reprint label" on that package’s row: the label is rebuilt with the same tracking number and the same details, and the reprint itself is recorded. Use "Export CSV" or "Copy" in the panel toolbar to take the rows you have loaded out as a file or into a spreadsheet.
Order History: look back at packed orders, void a label#
The second tab in the History drawer is Order History: every order packed in this warehouse on the chosen day, newest first — packed by other stations in the same warehouse included. Each row shows when it was packed, the order number, the carrier and service, how many packages it has and every tracking number, who packed it and at which station, plus a status badge (Packed, Shipped, Voided, Voided · back to packing, or Packing). Today is shown by default; pick another date to find yesterday’s order. Tick "Only mine" if you only want your own orders, and use Refresh to pull the latest state — the list does not update itself while it sits open.
Tap View on a row and the order loads in view-only mode: a blue banner at the top names the order and when and by whom it was packed, scanning is off, and packages, items and serial numbers are there to check — nothing can be changed. Two things still work in view mode: printing the Packing List, and voiding a package label. Voiding works exactly like on a freshly packed order: carrier labels are voided at the carrier first, and only a successful void changes anything here. If the void sends the whole order back to packing, the banner grows a "Take over & keep packing" button — tap it only when you really want to reopen the order on this bench and pack it again; otherwise use "Back to work" to leave view mode. If you are in the middle of packing another order when you open a history row, the bench first asks whether to drop that unfinished progress. An order already handed over for the day cannot be voided — the page will tell you so.
Packing materials#
Packing materials are ordinary products with item_type='material'. Each one carries an is_chargeable flag (chargeable or free) and a unit_price.
- When a tenant-level paid carton is used at shipment, the system bills automatically: billing item WMS-PACK-MATERIAL, event pack_material_used — one line per order, quantity = number of paid cartons.
- Free cartons supplied by the client are never billed.
After packing: stay on the order, check the labels, reprint#
By default, when an order finishes packing the station stays on that order instead of jumping straight to the next one. You see the order number, the tracking number in large type, and every package with its print status — printed, created but not printed yet, or print failed. This is the moment to catch a label that never came out of the printer.
- A package whose label did not print (or failed) has a Reprint label button. Reprinting prints the same label with the same tracking number — it never buys a new label, so you will never get a duplicate charge or a second tracking number.
- To move on, just scan the next order’s barcode (or type its number) — the station switches right away, no buttons to press. If you scan the order you just finished by mistake, the screen simply stays put and tells you it is already packed; nothing is lost.
- A package with a tracking number you typed in by hand has no system label, so it shows no reprint button — that is expected.
Prefer the old way — finish and jump straight to the next order? Open the ⚙ gear button (Manage stations) at the top-right of the Packing Station toolbar: under “After an order is done” you can set the tenant default for all stations, and each station can either follow that default or have its own choice (“Stay on this order” / “Go straight to the next order”).
Cart batches: work a whole picking cart order by order#
When a picking cart arrives with several orders on it (cluster picking), scan the cart number (or the pick task number) at the Packing Station — the batch list pops up right away, even if another order is already open on the station. One row per tote, in the cart’s physical tote order, showing the tote ID, the order number and its status — To pack, Packing, Done or Needs attention — with the batch progress at the top (for example, 2 of 6 done). Highlight a row with the mouse or the ↑ / ↓ keys and press Enter to open that order. Work the totes in the same order you see them on the cart.
- Highlight any To pack row and press Enter to start that order — you can work out of order if you need to. When you finish an order, the completion screen shows one big “Back to batch list” button and the focus is already on it: press Enter (or tap it) to reopen the list — the finished row turns Done, and the next To pack row is highlighted as “Next”, but it never opens by itself. You can also skip the button entirely: just scan the next order (or the cart again) and the station goes straight to it. If your station is set to go straight to the next order, finishing one order loads the next To pack order automatically, and the list opens when the batch runs out.
- Close the list at any time with Esc or the ✕ button — closing it never loses your place. Scan the cart number again whenever you come back (even in the middle of another order) and the list pops up rebuilt from the live order statuses, so a colleague can take over. If another station is already packing an order, its row shows Packing.
- An order that is on hold or cancelled shows as Needs attention with the reason. You can open it from the list to check it, or simply skip it — one problem order never blocks the rest of the cart. An order that has already shipped shows as Shipped and can no longer be opened from the list; the arrow keys skip over it automatically. When every row is done, the list says the batch is complete and the cart is free for the next batch; if only attention rows remain, you can finish the batch and deal with those orders separately.
Wave pallets: print a whole pallet of single-unit orders in bulk#
If a wave was picked onto one pallet and every order on it is a single unit, you do not have to scan the product once per order. When the wave was created with “Single-unit batch shipping” on — the switch in the Create Wave wizard, or the same default on its Wave Template — scanning the pallet label at the Packing Station opens a batch overview on top of the wave screen: the pallet, the wave number and the progress (for example, 5 of 12 shipped), then one group per product with how many orders are left.
- Tap “Bulk print labels” on a group and the station creates and prints one label per remaining order in that group, one after another. Every label belongs to its own order in the system, but within the group the labels are interchangeable: stick them onto the units in any order. You can also type a smaller number first if you only want part of the group now — the overview always shows what is left.
- A group can only bulk-print when everything in it lines up: all orders on the same carrier service, picked from the same lot, with the product’s weight and size on file. If something does not line up, the group says why in plain words and you ship those orders one by one with the scan box below — nothing is blocked. Serial-number products always go one by one: scan each serial so its label lands on that exact unit. Orders that need repacking print in bulk too, once you pick one box for the group — every order in the group then uses that same box.
- If one order fails during a bulk print — for example its carrier account was disabled — only that order is held back: it stays in the group, marked in red with the reason, while the rest finish. Fix the cause and tap “Retry failed”: only the failed orders are processed again, never a second label for an order that already has one. A label that printed but did not come out of the printer can be reprinted from its row below, and voided the same way as any other label. When the progress reaches the full count, the overview says the batch is fully shipped and the pallet is free for the next wave.
Queue: see everything waiting to pack, most urgent first#
At the Packing Station, tap “Queue” in the toolbar — the queue opens as a panel sliding in from the right. The queue lists everything that has finished picking and is waiting to pack in the current warehouse — single orders, whole cluster-pick carts, and wave pallets — sorted so the most urgent work comes first. Each row shows what it is, which client it belongs to, how many orders and items it holds, how far along it is, and when it is due. You do not have to use the queue: scanning a code works exactly as before, and anything packed by scanning leaves the queue by itself.
- Due times come from, in order: the promised ship date on the order; the carrier cut-off time (when one is set for today); or a packing SLA counted from when picking finished (24 hours by default — adjustable, see below; a client can have its own SLA). Rows past their due time are flagged overdue in red; rows due within two hours are flagged in yellow.
- Tap “Claim & start” on a row to claim it for your station and open it right away — a single order opens in the normal order flow, a cart opens the batch board, a wave pallet opens the wave flow. Claiming is a soft marker, not a lock: it shows your colleagues this batch is being worked on, and it expires on its own after 30 minutes without activity (packing activity renews it). If you scan a batch another station has claimed, you can still pack it — the screen simply tells you once that you are working on the same batch.
- Claimed something by mistake? Use Release on the row to put it back into the shared queue. A supervisor can assign a batch to a specific station from the queue (“Assign to station”): it lands in that station’s “Assigned to my station” section at the top, where the operator can claim it or return it. If a claimed batch is stuck (the operator left), a supervisor can force-release it with a short reason, which stays on record.
- When you finish work that came from the queue, the completion screen offers a big “Back to queue” button (with the stay-on-order setting). If your station goes straight to the next order, finishing a queue batch reopens the queue when more work is waiting. For a cart batch, the “Back to queue” button appears under the batch-complete banner on the batch board.
- A batch whose remaining orders are all on hold or cancelled stays in the queue as one problem row at the end — it cannot be claimed; handle those orders in the exception list first. Orders on hold never appear as claimable single orders.
Queue settings live under the ⚙ gear button (Manage stations) at the top of the Packing Station: the tenant-wide packing SLA (hours after picking, used when an order has no promise date and no carrier cut-off) and the claim hold time (minutes). A specific client can carry its own SLA, which then wins over the tenant value for that client’s orders.
Packing extras: extra steps a client asked for, confirmed before the box is sealed#
Some clients want a little extra done on every order: a return label in the box, a gift card, special packaging, or a flyer. Set that once for the client and Docklify reminds the packer on every order — nothing is left to sticky notes. Open Master Data → Clients, open the client, and find the “Packing extras” section: four steps, each with its own on/off switch — Return label insert (every package), Gift card insert (first package of the order), Special packaging (type the exact instruction; the packer sees your words as-is, so write them clearly), and Flyer insert (every package). Each step can also be marked chargeable or free, and set to apply to every package or once per order. Save, and from then on that client’s orders carry these steps; orders already packed are not affected.
- At the Packing Station, an order with packing extras shows its checklist inside each package: open a package and that package’s steps are right there, one row per step — switch to another package and the checklist switches with you. Do the step, tap “Done — confirm”, and the row ticks off. When everything is confirmed the list folds into a green “all done” line. An order with open steps cannot finish packing — the station tells you exactly which step and which package is missing, and finishing goes through as soon as you confirm it.
- On a cart batch board, an order with packing extras shows a “VAS ×N” badge on its row, so you know before you even open it; once opened, the same checklist appears. On a wave pallet printed in bulk, orders that need the same steps are grouped together: tick the group confirmation once before printing — the steps are then recorded for each order whose label actually printed (an order whose label failed is not recorded; confirm it from its own checklist when you retry).
- If a step genuinely cannot be done — the client cancelled it for this order, or the inserts ran out — a supervisor can waive the open steps for that order from the checklist: the supervisor is picked from the list, a reason is required, and the waiver is recorded on the order and never charged. Packers cannot skip steps on their own.
- Charged steps are recorded once per confirmation: a per-package step counts once per package, a per-order step once per order, and the records land in the monthly billing detail where both the warehouse and the client can reconcile them. If a step has been done but its charge item is not set up yet, the count is kept (packing is never blocked) and posted automatically once the charge item exists — the client’s Packing extras section shows how many are waiting, with a “Post them now” button.