Zone picking layout: one picker per zone, orders relay between zones
How zone picking works on the floor: split the warehouse into zones, give each zone a fixed picker, let orders relay from zone to zone in totes, and merge them at a consolidation area next to packing — plus which warehouses should use it and which should not.
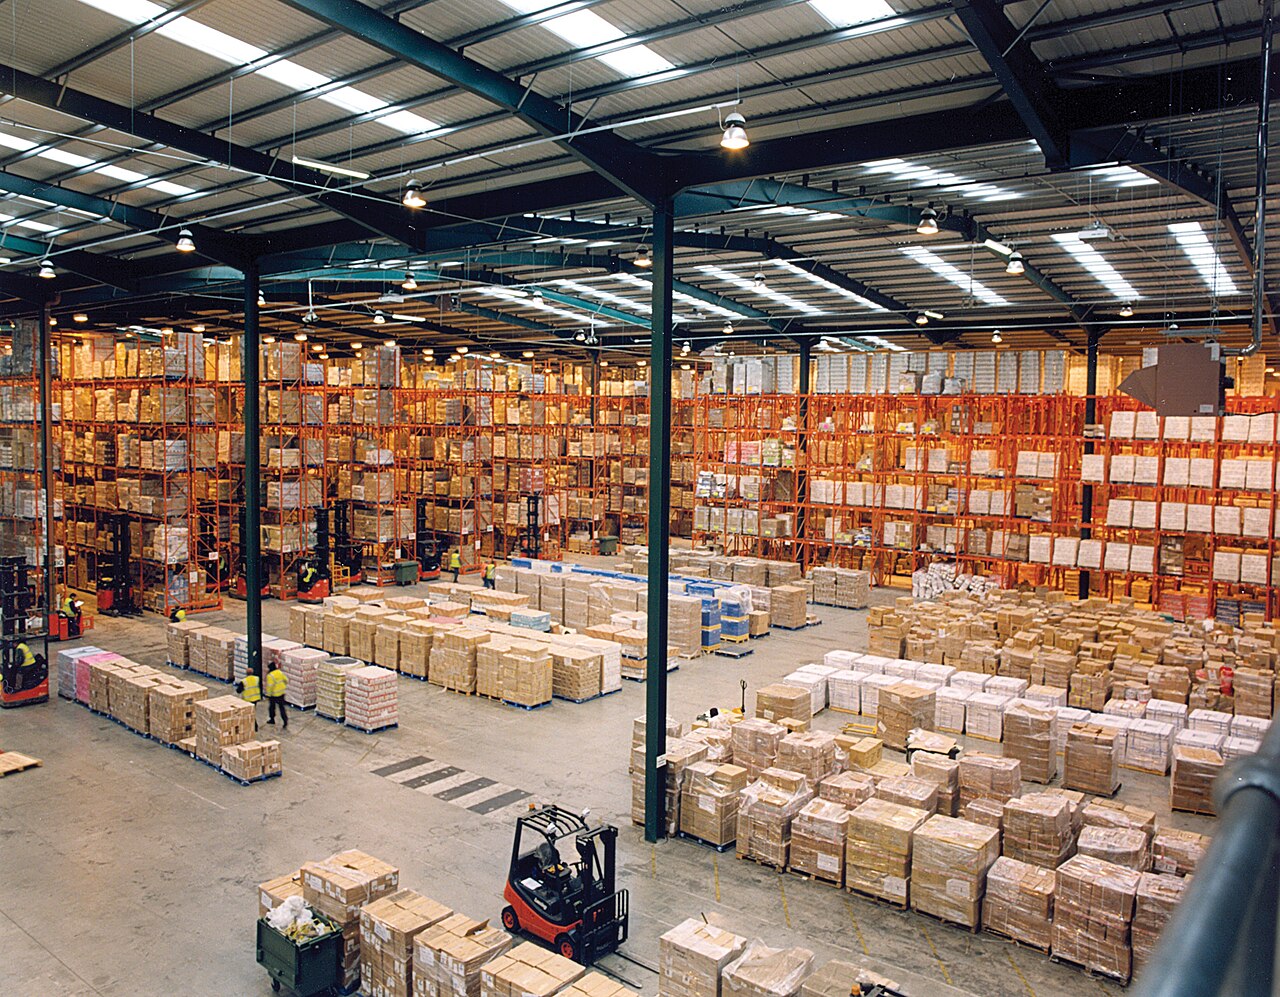
In a small warehouse, one picker takes one order and walks the whole building. That stops working when the building gets big: one order has items in aisle 3, aisle 18 and the cold room, and the picker spends the day walking instead of picking. Zone picking changes the division of labor: the warehouse is cut into zones, each picker stays inside one zone and picks only that zone’s share of every order, and the order travels between zones in a tote until all its pieces meet at the consolidation area. Nobody walks the whole warehouse — the goods do the traveling.
The mental model is a relay race. Each zone is one runner who covers a fixed stretch; the tote is the baton. When a zone finishes its share, it does not walk the baton to the finish line — it hands the whole picking cart to the consolidation area, and consolidation is the finish line where complete orders are merged into shipping cartons. Three phrases summarize the whole method: split by zone, merge by order, quantities must match.
Cutting the zones: follow aisles and work types#
Zones are physical areas, drawn on the floor plan. Cut along aisle boundaries, never through the middle of an aisle — a picker should be able to say “everything on this side of the cross-aisle is mine”. Keep each zone a size one person can cover in a few minutes per cart: if a single zone share of a batch takes half an hour, the zone is too big and becomes the bottleneck everyone waits for. Balance the load, not the square meters: a small zone full of best sellers can hold more work than a huge zone of slow movers.
- Cut by product behavior: small-item shelving, pallet racking, cold storage and oversize goods naturally form different zones, because they use different equipment and pace.
- Keep one zone, one picker as the default. Two pickers in one zone means two people hunting the same shelves and blocking the same aisle; a busy zone gets a second zone, not a second person.
- Draw the zone borders where people can see them: colored floor tape, a sign at each zone entry, and the zone code in the location code itself, so a location label already tells you its zone.
In Docklify, this physical split is the Zone: every location belongs to exactly one zone, and only picking zones take part in zone picking — storage and functional zones never do. You set each picking zone’s consolidation point once in Zone management, and that is where its carts are pushed when picking is done.
The relay in practice: batch, cart, tote#
Zone picking runs in batches, not order by order. A supervisor selects a group of outbound orders — say twenty — and the batch is split by zone: zone A may hold pieces of fourteen of them, zone B of nine, zone C of seventeen. Each zone gets one pick task covering its share of all twenty orders. This is why the batch matters: a zone picker who picks twenty orders’ worth of goods in one trip walks the zone once, instead of once per order.
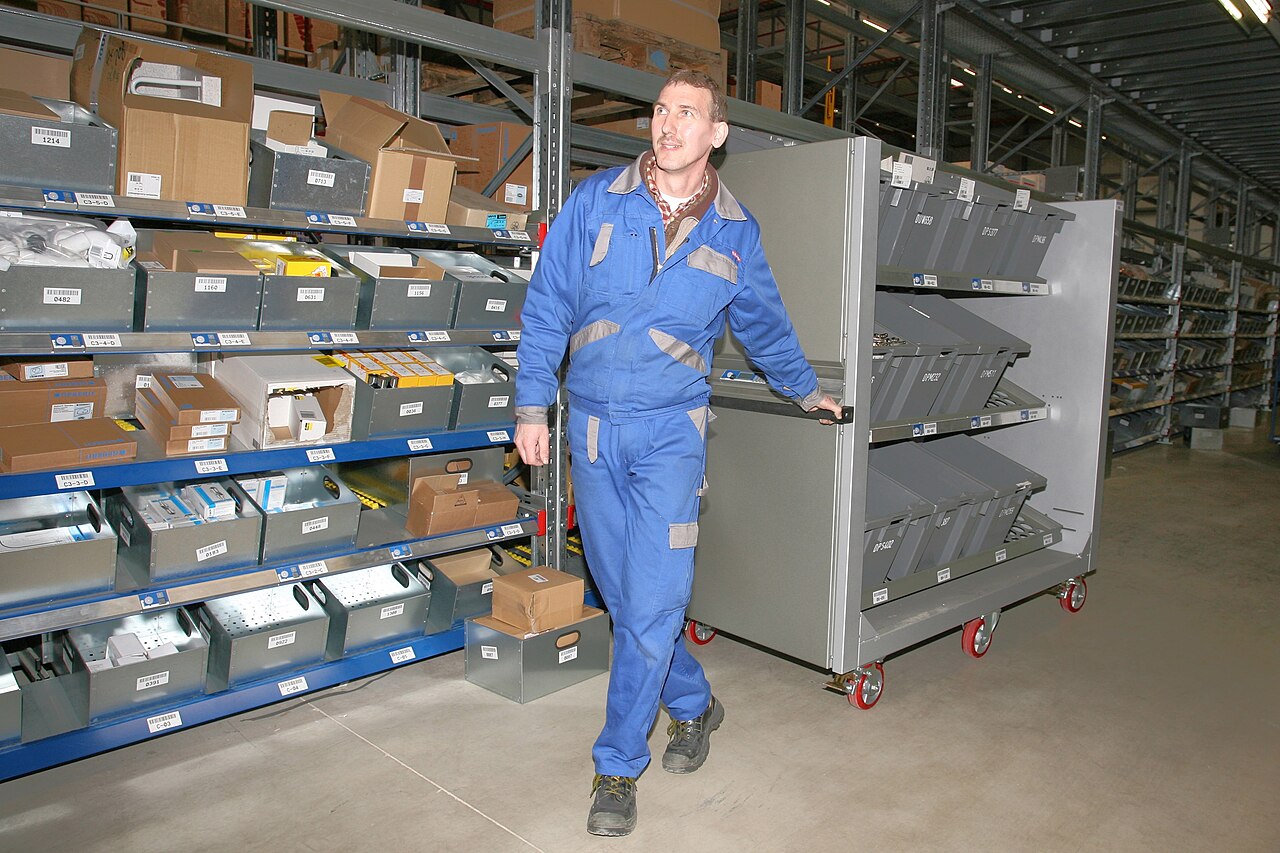
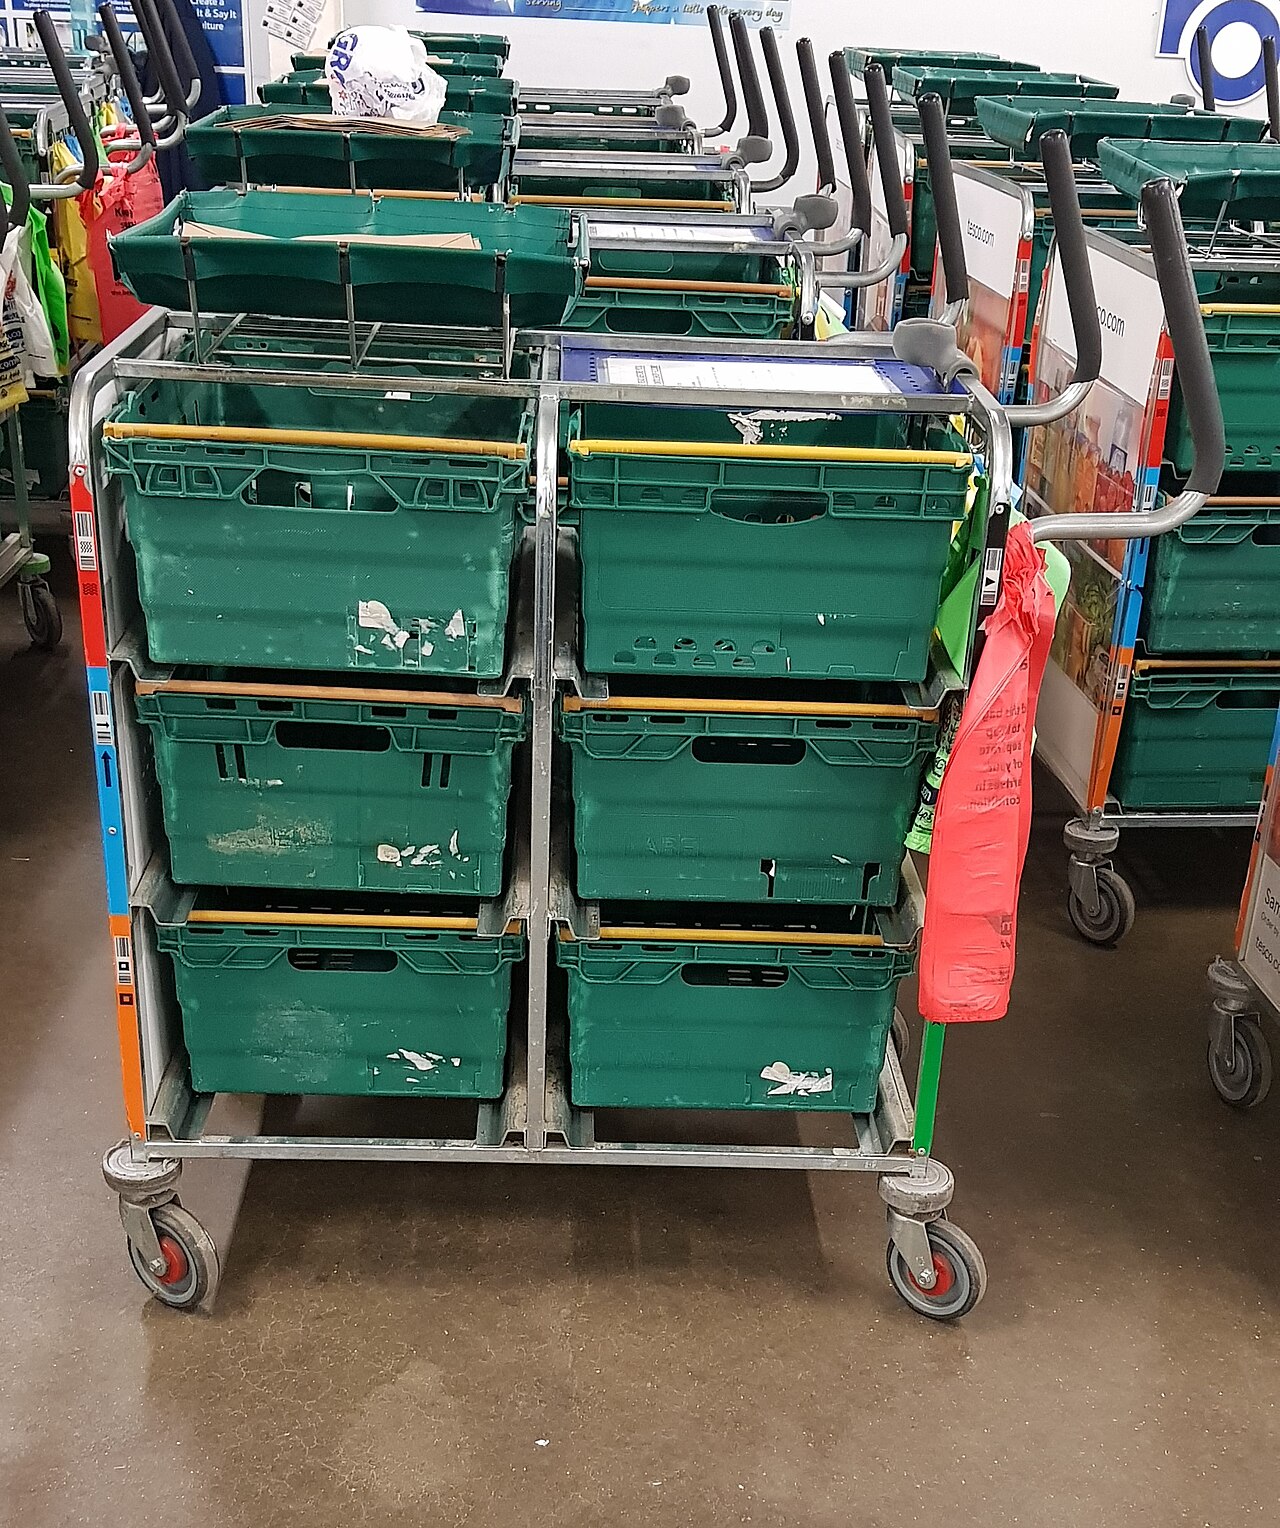
The iron rule that makes the relay work is one tote per order. On the cart, every order owns exactly one tote; two orders never share a tote, even if both are half empty. It feels wasteful until the first time two orders get mixed — untangling a mixed tote costs ten times the space the empty half would have. Totes carry permanent, reusable barcodes, and the cart itself has a scannable cart code, so the system always knows which cart carries which orders.
In Docklify, the batch flow runs from the outbound order list: select orders, choose Zone Pick from the Create pick task menu, and read the precheck first — it shows how each order splits across zones and flags lines that cannot be fully covered. Confirming creates a consolidation batch with a CB- number and one pick task per zone that actually has stock, auto-assigned to the picker bound to that zone in Zone management.
The consolidation area: where, and how big#
Consolidation is where totes wait for their order to complete. Put it on the natural path between the picking zones and packing — ideally directly in front of the packing stations, so a merged order walks two steps, not twenty meters, to be packed. Never put it behind the storage racks or across a forklift route: every cart pushed there crosses that traffic all day. If zones sit on two floors or in two buildings, use one consolidation area per building and merge there; carrying totes between buildings destroys the savings.
- Lay it out as numbered floor slots — C-01, C-02, C-03 and so on — one order waiting per slot, each slot with its own barcode label at its head. One slot, one order, never mix: most wrong-item shipments are born from two orders sharing one spot.
- Size it by the batch, not by the building: 8–12 slots handle a typical batch, because orders complete and free their slots continuously. If slots are always full, the problem is usually a slow zone or slow packing — not too few slots.
- Keep a small overflow corner for the one oversized item that never fits a tote; label it with the order number and let it wait there rather than blocking a slot.
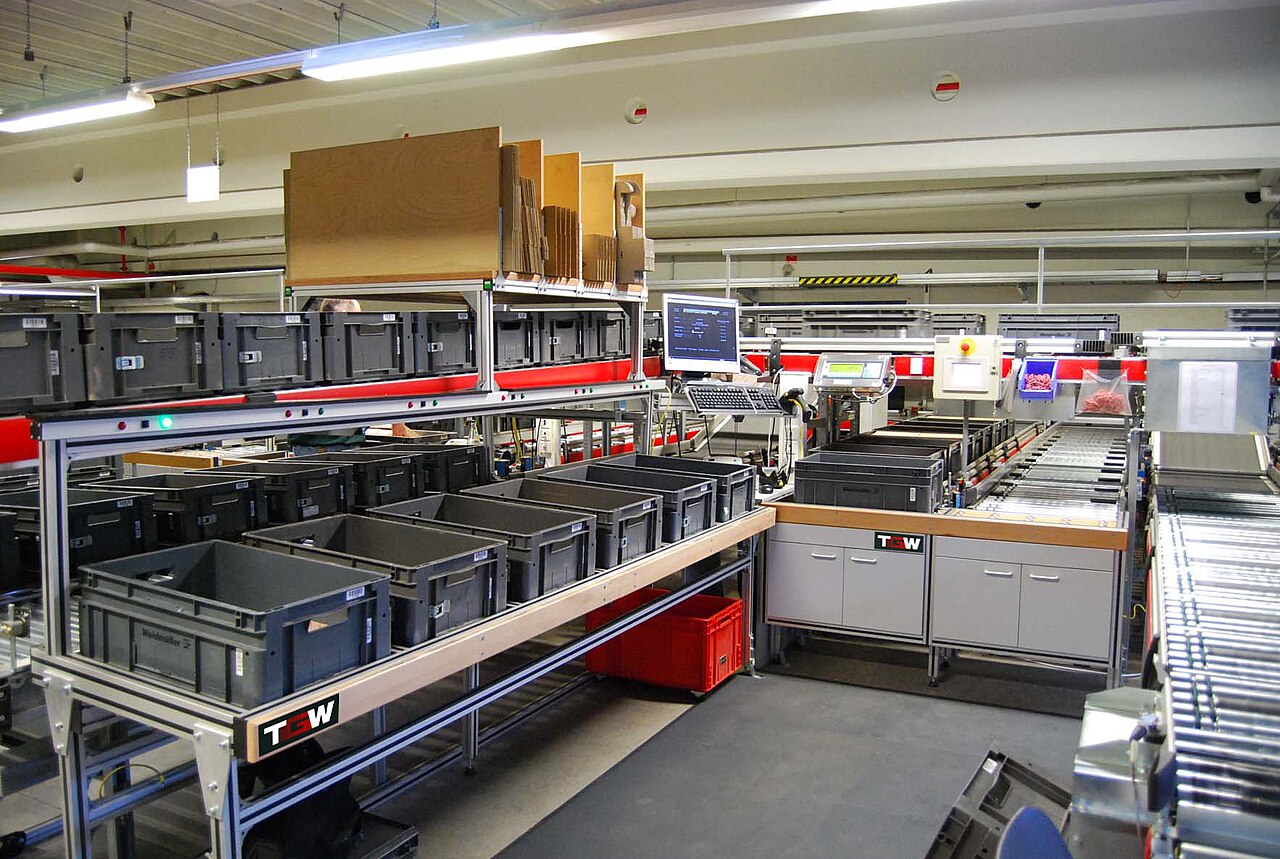
In Docklify, the consolidation area is a consolidation-type zone with those numbered slots, and each picking zone points at it through its consolidation location setting. When a zone finishes, the picker pushes the whole cart there and checks it in with two scans — slot code, then cart code — on the desktop Consolidation → Check-in page or on mobile; every tote on the cart is counted as received for its order in one go.
Consolidation and packing: neighbors, not the same job#
Consolidation ends where packing begins. Consolidation’s job is completeness: has every tote of this order arrived, do the quantities add up to the order? Packing’s job is the parcel: right carton, protection, seal, label. When the two are mixed — packers pulling from half-arrived orders because the packing table is also the waiting area — errors follow: a parcel ships without the piece that arrives ten minutes later. Keep a visible line between them: an order crosses into packing only when it is complete, and packing never reaches back into the waiting slots.
In Docklify, the merge step follows exactly that line: the consolidation board shows, per order, received versus expected totes and which zones are still missing; an order turns Ready only when every zone’s share has arrived. You merge order by order — pour the totes into the outbound cartons the system suggests, confirm the carton count, seal and label — and the freed slot goes to the next waiting order.
Zone is not Location Group: do not mix them up#
| Question | Zone | Location Group |
|---|---|---|
| What is it? | A physical area of the warehouse; it decides who picks where and in which scope a task runs. | A virtual grouping by rule — cold, hazmat, high-value, food-grade, one client’s goods. |
| How many can a location be in? | Exactly one. A location has a single physical home. | Several at once — the same location can be cold and high-value. |
| What is it for? | Splitting picking work: zone pick tasks, zone scope on Order/Cluster/Wave tasks, consolidation points. | Storage and compliance rules: which goods may go where, and putaway direction. |
In Docklify the two live side by side: zones are the physical split used by zone picking, while Location Groups (WMS → Location Groups) carry the rule-based attributes, with one location allowed in several groups at once. A cold room is a good example: physically it is one zone with its own picker; as a rule it is also a Location Group, so putaway never sends ambient goods into it by mistake.
Which warehouses should use it — and which should not#
| Signal | Zone picking fits | Zone picking does not fit |
|---|---|---|
| Warehouse size | Walking one order end to end takes many minutes; several distinct areas exist. | One picker sees most of the warehouse from the packing table. |
| Order profile | Multi-line orders whose items scatter across areas; steady daily volume to form batches. | Mostly single-item orders, or a handful of orders a day. |
| Team size | At least 3–4 pickers, so zones can each have an owner and still cover absences. | One or two pickers total — zones would leave each person idle between batches. |
If your warehouse does not fit, do not force it: a small warehouse gets more from Batch Order Pick — several orders in one walking trip — than from zones and consolidation. Zone picking pays for its extra handoff step only when the walking it removes is bigger than the merging it adds. Revisit the question when the building, the team or the order profile changes; warehouses outgrow their first layout quietly.
The first week: what to watch#
Zone picking rarely fails in the design; it fails in the first week’s habits. Watch the clock per zone for the first batches: the whole batch moves at the speed of the slowest zone, so a zone that finishes twenty minutes after the others is telling you its borders or its SKU mix are wrong — rebalance the zones before blaming the picker. Watch the consolidation slots at the busiest hour: slots that stay full while packers wait for one zone are the same signal, seen from the other end.
- Mixed totes are the third watch: any tote that arrives at consolidation holding two orders means the one-tote rule broke at the cart, not at consolidation. Fix it at the cart — a second tote is cheaper than a wrong shipment.
- Keep the first batches small — five to ten orders — and grow them only when merges run clean. A batch size you cannot merge smoothly is not capacity; it is a queue wearing a costume.
Docklify features used in this article#
- Zones — Zone management: every location belongs to exactly one zone; only picking zones join zone picking, and each picking zone gets a consolidation location and a bound picker.
- Zone Pick generation — WMS → Outbound Orders → Create pick task → Zone Pick: precheck shows the per-zone split and shortages; confirming creates a CB- consolidation batch and one auto-assigned task per stocked zone.
- Whole-cart check-in — Consolidation → Check-in (desktop or mobile): scan the slot code, then the cart code; every tote on the cart is received for its order at once, and mixed-batch carts are refused.
- Consolidation board and merge — the board shows received vs expected totes per order and missing zones; Ready orders are merged into outbound cartons order by order.
- Location Groups — WMS → Location Groups: rule-based groups (cold, hazmat, high-value, client-dedicated); one location can belong to several groups at once, unlike zones.